Install an Outdoor Water Garden
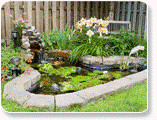
You can create a serene setting in your yard by adding an outdoor water garden. This affordable home project adds value to your home, creates a relaxing oasis for you and is a natural habitat for plants and animals.
Your local True Value hardware store has the expert advice and products you need to get started. Then follow the do-it-yourself steps below.
________________________________________

Step 1. Plan Your Garden
First, find a suitable location. Choose a spot you'll be able to enjoy that's close to a power source for the necessary water pump. To keep your water garden clean of debris and leaves, don't locate it under overhanging trees. Make sure your garden will get adequate sunlight, as most aquatic plants require four to six hours of sunlight a day to ensure healthy growth.
Don't install your garden at the bottom of an incline. Rainwater runoff could flood it, and fertilizer and other chemicals you add to your lawn could flow in and harm the fish and plants.
Create some rough sketches of your water garden to visualize how it will look in your yard. Consider space and time limitations. While smaller fountain-type water gardens take up less space, larger pond-style water gardens are often self-sustaining and require less maintenance.
Step 2. Dig a Pond
Clear the area of any rocks, sticks and other debris. Outline the garden shape with a garden hose or rope. It's up to you to decide what the shape will be. An ideal size is about 5' wide at its widest point. Use a shovel to excavate inside the outer edge of the "roped-off" area about 18" to 24" deep. Dig with a slightly downward slope into the center of the pond floor. Rake a 1" layer of sand evenly across the pond floor before installing a liner.
To allow your pond to support a more diverse range of plants, create a plant shelf. Rather than simply sloping the sides to create a rounded bowl shape, create a level area on the inside of the pond about 1' deep and 1' wide. This shelf will allow you to plant shallow water species. For taller bog plants, you will want to create deeper shelves.
Safety Alert!
• Before digging, contact your local utility companies to see if there are any underground power or gas lines nearby.
Step 3. Install A Liner
There are a variety of different liner options available including both preformed and flexible liners. Preformed, rigid plastic liners are the easiest to set up—all you have to do is dig your pond and place the liner in it. Flexible liners can be shaped to any desired shape and are made of rigid fiberglass, rubber or PVC plastic. Fiberglass liners are nearly indestructible to the elements but can be more expensive. PVC or rubber liners are more flexible, less expensive and allow you to create unique shapes for your pond. Consider how long you want your pond to last when choosing your liner. PVC liners last about 15 years while heavy-duty liners made of butyl rubber can last up to twice as long.
Unfold your liner in the pond. It helps to have someone else around to help to avoid dragging and tearing the liner. Arrange the pleats along the edges to fit into the pond's contours. Trim any excess material around the outer edges using scissors or a utility knife, leaving a 6" to 12" flap all the way around the pond. Use a hammer and 6" nails or stakes to secure the flap to the ground. Create a border by placing rocks or flat stones around the pond edge, leaving a few hanging over the reservoir to create a small overhang. This will hide the liner and protect the pond from the sun. For a formal edging or coping, set paving stones in a bed of mortar that's three parts sand and one part cement.
Helpful Tips:
• To calculate liner size, add twice the pond's depth plus 2' for edging to both the pond's length and width. For example, a 10' x 12' pond that's 2' deep would require a 16' x 18' liner.
• To add a pump for a fountain or water source at a future date, incorporate an electrical and a water pipe in any coping or stone edging.
Step 4. Install Water Pump
A submersible water pump circulates the garden water, making your garden a healthy environment for the flora and fauna that will live in and around it. The size of your water garden should determine the size of your pump. If the reservoir is very large, center the pump inside the pond or install a second pump to maintain water movement.
Place a flat brick or stone at the bottom of the pond to act as a small shelf—elevating your pump prevents it from clogging with any debris that settles on the bottom of the pond. Install the filtration system onto the pump. Fill the pond with water from a garden hose and de-chlorinate the water using a water conditioner before testing the pump.
Helpful Tips:
• Use steel mesh to cover and protect your submersible pump.
Safety Alert!
• Avoid the risk of electrical shock by keeping all electrical cords outside of the pond until you're ready to turn it on.
Step 5. Plant and Stock Pond
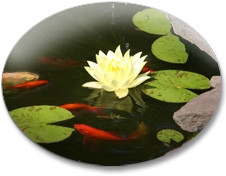
Try to cover approximately half the pond's surface with plants, using a variety of floaters, marginal plants and submerged plants, or oxygenators, in the pond. Floaters—lotuses, water hyacinth and white water lilies—are popular choices and adapt well to cold winters. Marginal plants, such as marsh marigold and rushes, grow vertically and increase the visual interest or your water garden. These plants thrive in as little as 2" to 12" of water. Oxygenators, such as Washington grass, anarcharis and wild celery, are important for a strong water garden because they absorb excess nutrients and help keep algae at bay. For shallow water along the perimeter, consider Arrowhead, Pennywort, Water Hawthorne or Sweet Flag.
Using heavy soil, pot your plants in pans or tubs and place them in the pond. Use sand for potting submerged plants. To keep deep-water plants above the surface, place those pots on top of several bricks. As the plant grows taller, you can remove the bricks one by one.
Adding fish further increases the beauty of your pond and also helps control mosquito populations. Popular choices are types of carp, including common goldfish and colorful, docile Japanese Koi fish. Adding snails to your water garden will also help filter the water—snails consume excess organic matter and eliminate algae. Add one snail per square foot of surface area.
Helpful Tip:
• Before introducing fish and snails, float them on the surface of the pond for a half hour inside the bag they were sold in. This will help them adapt to their new environment before they are released.
Step 6. Maintain the Garden
To keep your water garden healthy, attractive and thriving, you must maintain it regularly. Every week, remove the filter from the pump and clean it. You'll know when the pads need cleaning because the flow of water from the pump will be noticeably reduced. Remove the lid and pads from the filter and rinse them thoroughly in fresh water.
Feed your fish commercial protein fish food once or twice a day during the spring and summer when they're most active. If you live in a hot climate, cut back feeding on very warm days. In winter, fish usually hibernate and do not need to be fed.
Feed aquatic plants by pushing fertilizer tabs into the soil of their pots once or twice a month. In winter, delicate plants should be lowered deeper into the water. Common lilies need no special care as long as they receive plenty of sun. Tropical varieties of lilies, however, should be cut off at the tubers (the walnut-sized growth at the crown of the plant) with a utility knife and stored in containers in a dark room during the cold months. Marginal plants should also be cut back and brought inside during the cold months. Floaters like water hyacinths and water lettuce usually die down to buds in winter and sink to the bottom.
Helpful Tips:
• Don't be concerned if you notice a burst of algae growth shortly after filling your water garden. As the snails and algae-eating plants become more established, the level of algae will decrease.
• Consult your pet store about feeding your particular breed of fish.
Great job! You've created a beautiful outdoor water garden that adds value to your home. You've also created a unique focal point for your yard that will be enjoyed by the entire family. For all of your projects around the lawn and garden, head to your local True Value hardware store to get the tools, products and expert advice you need to start right.
